Trezor.io/start — The Official Setup & Security Guide for Your Trezor Hardware Wallet
Trezor.io/start is the official starting point provided by the makers of Trezor hardware wallets to help users securely initialize and activate their device. It’s the safest entry into setting up your wallet, installing firmware, generating backups, and beginning to manage crypto — without exposing your keys to phishing or malware. (Trezor Start)
⚠️ Your wallet’s security starts here — never trust unofficial pages, download links from search ads, or setup instructions from random websites. Always make sure the URL is “https://trezor.io/start”. (help-trezer-start-en.typedream.app)📌 Why Trezor.io/start Exists
Setting up a hardware wallet correctly is more than just clicking a few buttons. Because you’re securing real, valuable crypto assets, the process must be verified, tamper‑proof, and resistant to scams or fake downloads.
Here’s what the start page ensures:
👉 1. Authentic, Verified Tools
The page links only to real Trezor software — Trezor Suite — which you’ll use to manage assets and control the hardware. Fake wallet software online can steal your keys. (Trezor Start)
👉 2. Official Firmware Installation
New Trezor devices may come without firmware installed — or with old firmware. The start page ensures you install the latest, cryptographically signed firmware so your device runs trustworthy software. (help-trezer-start-en.typedream.app)
👉 3. Proper Wallet Generation
Hardware wallets like Trezor generate seeds (the master backup of your keys) on the device itself — isolated from internet threats. The start flow makes sure you do this correctly. (Trezor Start)
👉 4. Avoiding Phishing and Fake Sites
Many crypto scams disguise themselves with URLs that look official. Starting at trezor.io/start guarantees you’re avoiding impostors. (help-trezer-start-en.typedream.app)
🧰 What You’ll Need Before You Begin
Before you go to the start page and plug in your device:
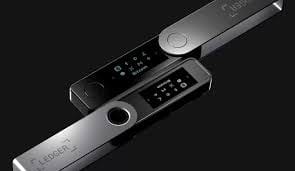
- Your Trezor hardware wallet (Model One, Model T, or newer)
- A USB cable (in the box)
- A computer or mobile device with a modern browser
- A quiet, private place to work
- Pen and paper for your recovery seed — never store it digitally! (start---tizor-io.pages.dev)
🪛 Step‑by‑Step Setup Guide Using Trezor.io/start
Below is how the Trezor start process usually flows once you visit the official page:
🔹 1. Visit the Official Start Page
Type or paste:
https://trezor.io/start
into your browser. Bookmark it if you’ll setup more than one device. (help-trezer-start-en.typedream.app)
🔹 2. Choose Your Device Model
You’ll be prompted to select the specific hardware you have, such as:
- Trezor Model One
- Trezor Model T
This ensures the setup instructions match your device’s features. (Trezor Start)
🔹 3. Install Trezor Suite
The start page gives you official download links for Trezor Suite — the desktop or web app used for ongoing wallet control.
Available for:
- Windows
- macOS
- Linux
- Web browser version
This app connects to your Trezor, detects it, and guides the rest of your setup. (Trezor Start)
🔹 4. Connect Your Trezor Device
Plug your device into the computer with the USB cable. The Trezor screen should light up and display a welcome message once connected. (Trezor Start)
🔹 5. Install / Update Firmware
If your device doesn’t have firmware installed — or it’s out of date — the Suite will prompt you to install the latest version. This firmware is digitally signed, meaning it’s verified authentic and safe. (Trezor Start)
⚠️ Don’t skip this — firmware updates fix security issues and ensure future compatibility.
🔹 6. Create Your Wallet & Generate Recovery Seed
Once firmware is installed, you can choose:
- Create a new wallet (most common)
- Recover an existing wallet (if you already have a seed)
If you create a new one, your Trezor will generate a 12, 18, or 24‑word recovery seed. Write this down manually on paper — do not take a photo or store it digitally. This is your backup in case the device is lost or damaged. (Trezor Start)
🔹 7. Confirm the Seed
The device will ask you to confirm a few words from the seed to make sure you copied them correctly. This step prevents mistakes. (Trezor Start)
🔹 8. Set a PIN
You’ll be asked to pick a PIN code that will lock the device. This keeps your wallet safe even if your Trezor gets stolen. (Trezor Start)
🔹 9. (Optional) Add a Passphrase
A passphrase is an advanced extra layer — essentially a “25th word.” If you use one, don’t lose it, because losing it means losing access to that hidden wallet. (us-trezor-eng.framer.ai)
🔹 10. Add Crypto Accounts
After setup, you can add and manage supported crypto assets — such as Bitcoin, Ethereum, Litecoin, and many others — via Trezor Suite. (Trezor Start)
🛡️ Security Best Practices
🔐 Never share your recovery seed
Legitimate support never asks for it. If someone requests it, it’s a scam. (Trezor Start)
📵 Never store seed digitally
Screenshots, cloud sync, or text files can be hacked. Write it on paper or use a secure metal backup. (Trezor Start)
🔗 Always confirm the domain
Make sure the start page’s URL and certificate are correct before entering anything. (help-trezer-start-en.typedream.app)
🔄 Keep firmware & Suite updated
Security patches and improvements are released regularly — apply them when prompted. (Trezor Start)
🧠 Advanced: How Trezor Keeps Keys Safe
When you set up your device via trezor.io/start:
- The Trezor device itself generates your cryptographic keys.
- These keys never leave the hardware wallet.
- Trezor Suite communicates with the device to sign transactions, but your private keys stay inside the secure chip.
- Even if your computer is compromised, malware cannot extract private keys because the signing happens on the device. (Trezr FAQ)
This separation is why hardware wallets are considered cold storage — the keys are physically isolated. (Trezr FAQ)
📌 Common FAQ
❓ Can I skip the start page and use another setup method?
Technically you could try, but it’s unsafe — you risk downloading fake software or malware. Always start on the official page. (Trezr FAQ)