Official Trezor Setup Portal – Trezor.io/start
🚀 What Is trezor.io/start?
trezor.io/start is the official setup portal for Trezor hardware wallets, used to safely initialize, configure, and begin using your device. This page guides you through every essential step — from connecting the device to securing your cryptocurrency safely. (io-strt-trezar.framer.media)
🔒 Why this page matters:
- It ensures you download authentic official software.
- It prevents phishing, fake websites, and malicious downloads.
- It guides you through key steps like firmware installation and recovery setup. (starthubio)
🧰 What You’ll Need Before You Begin
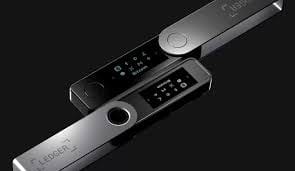
- Your Trezor hardware wallet (Model One, Model T, or Safe 3).
- USB cable (the original one included).
- Computer with Windows/macOS/Linux or supported mobile setup.
- About 15–20 minutes of time.
- Quiet place to write down your recovery phrase. (helpstarted)
🪶 Step‑by‑Step: Setting Up Your Trezor Wallet
1. 🔗 Open the Official Start Page
👉 In your browser, type https://trezor.io/start exactly.
📌 Do NOT click random links in emails or social posts — phishing attempts are common in crypto.
🔐 Always check the secure padlock icon in the URL bar. (helpstarted)
2. ⚙️ Download Trezor Suite Software
You’ll be prompted to download Trezor Suite — the official app that manages your wallet:
- Available for Windows, macOS, Linux
- Also has web options for browsers
- Acts as the secure interface between your wallet and blockchains (io-strt-trezar.framer.media)
Why this matters:
The Suite enables secure updates, asset management, and transaction control — without exposing your private keys online. (starthubio)
3. 🔌 Connect Your Trezor to Your Computer
- Use the USB cable included with the device.
- Your Trezor will light up and guide you.
- The software should auto‑detect the device.
- If it doesn’t, try a different USB port or cable. (helpstarted)
4. 🔄 Install or Update Firmware
If this is your first setup, you’ll be asked to install official firmware:
- This ensures the safest software version is running.
- Only install through Trezor Suite — never from unofficial sites. (helpstarted)
5. 🆕 Create Your Wallet or Restore Existing One
You will be asked:
🟢 Create New Wallet — for first‑time users
🔁 Restore Wallet — if you already have a recovery seed
6. 🧾 Recovery Seed – Your Most Important Step
Your device will display a recovery seed phrase (12, 18, or 24 words). This must be written down offline:
✔ Write it by hand on paper or metal backup tool.
✔ Keep it offline, secure, and private.
❌ Do NOT photograph, email, or type it digitally. Anyone with this phrase can steal your crypto. (io-strt-trezar.framer.media)
7. 🔑 Set a Secure PIN
Your Trezor will ask you to enter a PIN directly on the device:
🔐 Choose a strong, unpredictable PIN.
📌 You’ll enter this every time you connect the wallet.
⚠ Too many incorrect attempts can reset the device — you’d need the recovery seed to restore. (io-strt-trezar.framer.media)
8. 📊 Start Using Your Wallet
Once setup is complete, you can:
✔ View balances
✔ Send & receive crypto
✔ Manage accounts
✔ Add multiple assets
✔ Track portfolio activity
Every transaction must be confirmed physically on the Trezor device, protecting you even if your computer has malware. (starthubio)
🗝️ Security Best Practices
🛡️ Always type trezor.io/start manually
📍 Bookmark the official page
👁️ Verify transaction details on the device screen
📵 Never store your recovery seed digitally
⚠ Be wary of unsolicited support or messages asking for your seed (starthubio)
✅ Summary — What You Get from trezor.io/start
✨ A secure guided setup for Trezor hardware wallets
✨ Official software downloads (Trezor Suite)
✨ Firmware updates and device authentication
✨ Complete wallet creation or recovery options
✨ Strong security with offline key generation
✨ Easy, intuitive crypto management interface (starthubio)