Easy Trezor Wallet Setup | Secure Your Crypto Today
🔐 What Is Trezor.io/start?
Trezor.io/start is the official onboarding and setup page for Trezor hardware wallets (including Model One and Model T). It’s the legitimate starting point for setting up your device, downloading the right software, updating firmware, and securely initializing your wallet. (TreZor)
👉 Important: Always type https://trezor.io/start manually into your browser — don’t trust links from ads, emails, search ads, social media, or messages. Phishing sites mimic Trezor’s branding to steal recovery seeds. (Google Sites)
🧰 What You Need Before You Begin
Before you visit Trezor.io/start, make sure you have: (TreZor)
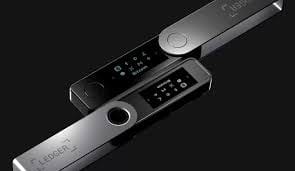
- Your brand‑new Trezor device (Model One or Model T)
- The USB cable that came with it
- A computer (Windows / macOS / Linux) with internet access
- A private, distraction‑free place to write your recovery seed
- Paper and pen (don’t store seed digitally)
💻 Step‑by‑Step: How Setup Works at Trezor.io/start
Below is the full process you’ll encounter when you use the official start page: (Google Sites)
1. 🔗 Visit the Official Page
Open your browser and go to trezor.io/start. The page detects your device and guides you forward. This preserves security and prevents imitation setup flows. (Trezr FAQ)
2. 📥 Download Trezor Suite
Trezor Suite is the official desktop app designed to manage your wallet, view balances, send/receive crypto, and update firmware.
✔ Available for Windows, macOS, Linux
✔ Required to complete wallet setup properly (Google Sites)
3. 🔌 Connect Your Trezor Device
Use the USB cable to connect your Trezor to the computer.
Trezor Suite will automatically detect it and prompt next steps. (Google Sites)
4. ⚙️ Install or Update Firmware
New devices often ship with no firmware installed.
You’ll be prompted to install the latest official firmware — only install updates from this trusted connection shown in Suite. (Google Sites)
5. 🆕 Create a New Wallet
You choose “Create new wallet” inside Trezor Suite. The device will generate a recovery seed — typically 12, 18, or 24 words — shown only on the physical device’s screen. (Google Sites)
6. 🧾 Record and Confirm Your Recovery Seed
Write down all seed words by hand on paper — or better, on a metal backup plate.
✔ Do NOT take photos
✔ Do NOT store digitally
✔ Do NOT share with anyone
You’ll confirm the words back on the device to ensure accuracy. (Google Sites)
7. 🔢 Set Your PIN
Trezor will ask you to create a PIN that’s required every time you use the device.
This protects your wallet if someone gets physical access. (Google Sites)
8. 💼 Use Your Wallet
After setup, Trezor Suite lets you:
- Add and manage crypto accounts
- Send and receive funds
- Check balances and transaction history
- Manage security settings like passphrases (optional) (Google Sites)
🔒 Security Tips for Using Trezor
These tips help protect your crypto safely: (Google Sites)
✅ Always start at the official start page (trezor.io/start)
❌ Never enter your seed on a computer, phone, or any website
📌 Write your seed offline (paper or metal)
🛡️ Confirm transaction details on the Trezor device screen before approving
🔑 Use optional passphrase for extra hidden wallet security
📌 Keep firmware and software up‑to‑date through Suite
📍 Why This Setup Matters
Using Trezor.io/start isn’t just a convenience — it’s integral to protecting your digital assets. Because hardware wallets generate keys offline and store them inside the device chip, mistakes like using unofficial software or entering your seed online can lead to theft or loss. (Trezr FAQ)
🧠 Summary — In Simple Terms
Trezor.io/start is the official and secure entry point for setting up your Trezor hardware wallet.
It:
- Links you to the official Trezor Suite download
- Walks you step‑by‑step through setup
- Ensures you safely generate and store your recovery seed
- Protects you from phishing and scams (TreZor)